Combine the Dry Ingredients: In a large mixing bowl, combine the all-purpose flour, whole wheat flour, fine semolina, instant yeast or starter, sugar, and salt.
Add the Olive Oil: Pour in the olive oil and mix thoroughly until it is incorporated with the dry ingredients.
Form the Rough Dough: Gradually add the lukewarm water or full-fat milk while mixing with a wooden spoon, then use your hands to bring everything together into a rough dough ball.
Rest the Dough: Cover the rough dough and let it rest for 10 minutes to make the kneading process easier.
Knead Until Smooth: Transfer the dough to a lightly floured surface and knead for approximately 10–12 minutes, pressing and pushing the heel of your palm into the dough and stretching it away from you until the dough becomes smooth and no longer sticky.
Adjust the Dough Moisture: If the dough needs additional moisture during kneading, sprinkle in a little water as needed, keeping in mind that semolina absorbs more moisture and the finished dough should remain soft.
Rest Again: Cover the kneaded dough and let it rest for 20–30 minutes.
Prepare the Rising Surface: Place a clean cotton sheet on a flat surface and dust it with semolina flour or flour to prevent the shaped Batbouts from sticking.
Roll the Dough: Transfer the rested dough to a lightly floured surface and roll it out to approximately ⅛ inch thick; divide the dough into two portions first if that makes rolling and handling easier.
Cut the Rounds: Use a cookie cutter or tumbler to cut evenly sized rounds from the rolled dough.
Arrange the Batbouts: Gently transfer each dough round to the prepared, dusted kitchen cloth, leaving them covered with another clean kitchen towel.
Reuse the Dough Scraps: Gather the remaining dough, shape it into a smooth ball, and let it rest for 5 minutes before rolling, cutting, and transferring more rounds to the cloth.
Let the Batbouts Rise: Keep the shaped rounds covered and allow them to rise for approximately 2 hours, or until doubled in size; the source notes that the pieces may need 2–3 hours before cooking.
Heat the Pan: Place a thick-bottomed pan or cast-iron pan over medium heat and allow it to become very hot before cooking.
Cook the Batbouts: Carefully lift the risen dough rounds and place as many as the pan can comfortably hold into the hot pan.
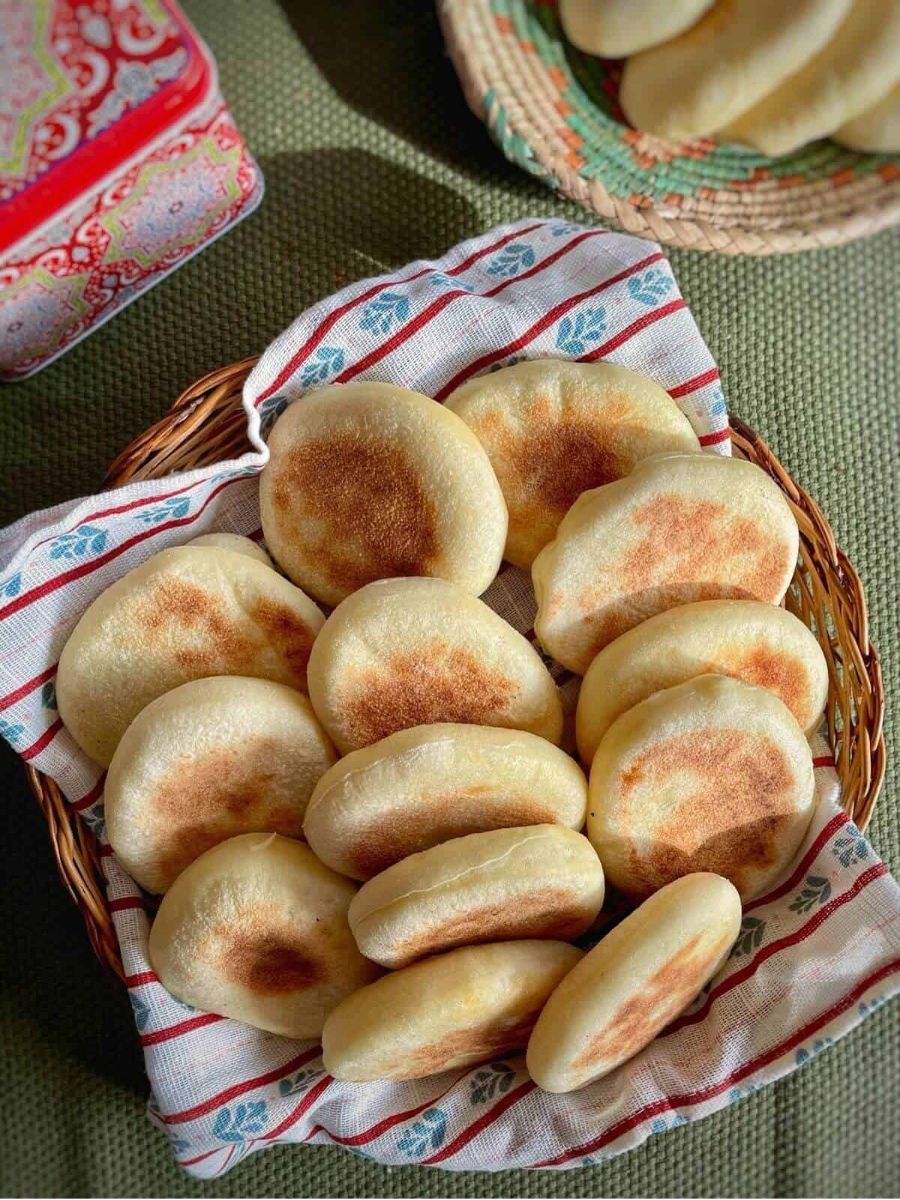
Flip Frequently: Flip the Batbouts after a few seconds, then continue flipping them several times as they cook until they become golden brown on both sides and puff up.
Check for Doneness: Look for golden-brown, slightly uneven browning and visible puffing as the Batbouts cook.
Transfer and Hold: Move the cooked Batbouts to a towel-lined basket to keep them together while you finish cooking the remaining pieces.
Serve or Store: Serve the Batbouts immediately, or allow them to cool and store them for later.
Fill and Serve: Serve them plain or partially slice them and fill with kebabs, tuna filling, roasted vegetables, or your preferred sweet or savory filling.