Activate the Yeast: Combine the yeast, 1 teaspoon (5g) of the sugar, and ⅓ cup of the lukewarm milk in a medium bowl, then let the mixture stand for 5–10 minutes to activate the yeast.
Mix the Dough: Whisk the flour, remaining sugar, and salt together in a large bowl, then add the remaining milk, activated yeast mixture, beaten egg, vanilla extract, and melted butter.
Knead the Dough: Knead the mixture until the dough becomes smooth enough to pull away from the sides of the bowl, using your hands, a hand mixer, or a stand mixer.
Divide the Dough: Split the dough into two equal portions, shaping one portion into a ball for the vanilla dough.
Prepare the Vanilla Dough: Place the vanilla portion in an oiled bowl and cover it with plastic wrap.
Prepare the Chocolate Dough: Add the cocoa powder and 1 tablespoon (15ml) milk to the second portion, then continue kneading until the cocoa mixture is evenly incorporated.
Rest the Dough: Place the chocolate dough in another oiled bowl, cover with plastic wrap, and let both doughs rest in a warm room-temperature space for about 1 hour, or until doubled in size.
Roll the Vanilla Dough: On an oiled surface, roll the vanilla dough into an approximately 8 × 12-inch (20 × 30cm) rectangle.
Roll the Chocolate Dough: Roll the chocolate dough into another approximately 8 × 12-inch (20 × 30cm) rectangle.
Layer the Dough: Place the chocolate rectangle directly over the vanilla rectangle.
Extend the Rectangle: Roll the stacked dough further until it forms an approximately 8 × 20-inch (20 × 50cm) rectangle.
Begin Rolling: Starting from one end, roll the layered dough toward the opposite end, stopping just before reaching the very end.
Create the Strips: Cut the rolled dough into about 10 strips, twisting some of the strips so the vanilla and chocolate colors alternate.
Finish Rolling: Continue rolling the prepared dough to form the loaf.
Transfer to the Pan: Place the shaped dough into an 8½ × 4½-inch (1-liter capacity) loaf pan lined with parchment paper.
Proof Again: Let the shaped loaf rest at room temperature for 30 minutes.
Preheat the Oven: Meanwhile, preheat the oven to 350°F (180°C).
Brush the Loaf: Brush the surface of the rested dough evenly with the beaten egg.
Lower the Temperature: Reduce the oven temperature to 320°F (160°C) immediately before baking.
Bake the Bread: Bake the loaf for about 40 minutes.
Protect the Top: After approximately 15 minutes, cover the loaf with aluminum foil if it is browning too quickly.
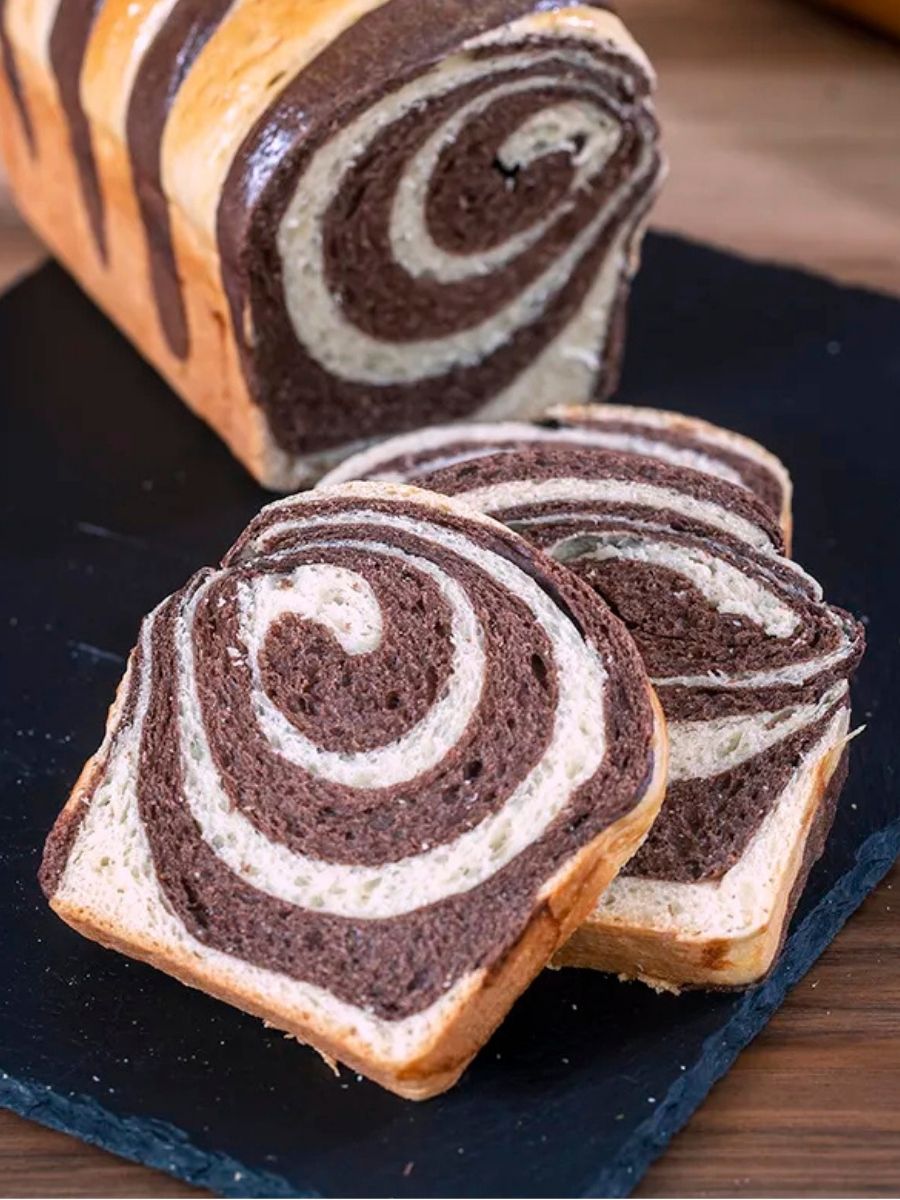
Cool Completely: Allow the chocolate swirl milk bread to cool completely before slicing.
Serve: Slice the cooled bread and enjoy.