
CookLibrary is a recipe curation and editorial platform. We research and curate recipes from public sources, considering ratings, reviews, comments, and feedback. We then refine and present them clearly for home cooks. We are committed to an ad-free, focused experience that makes discovering and preparing recipes easier.
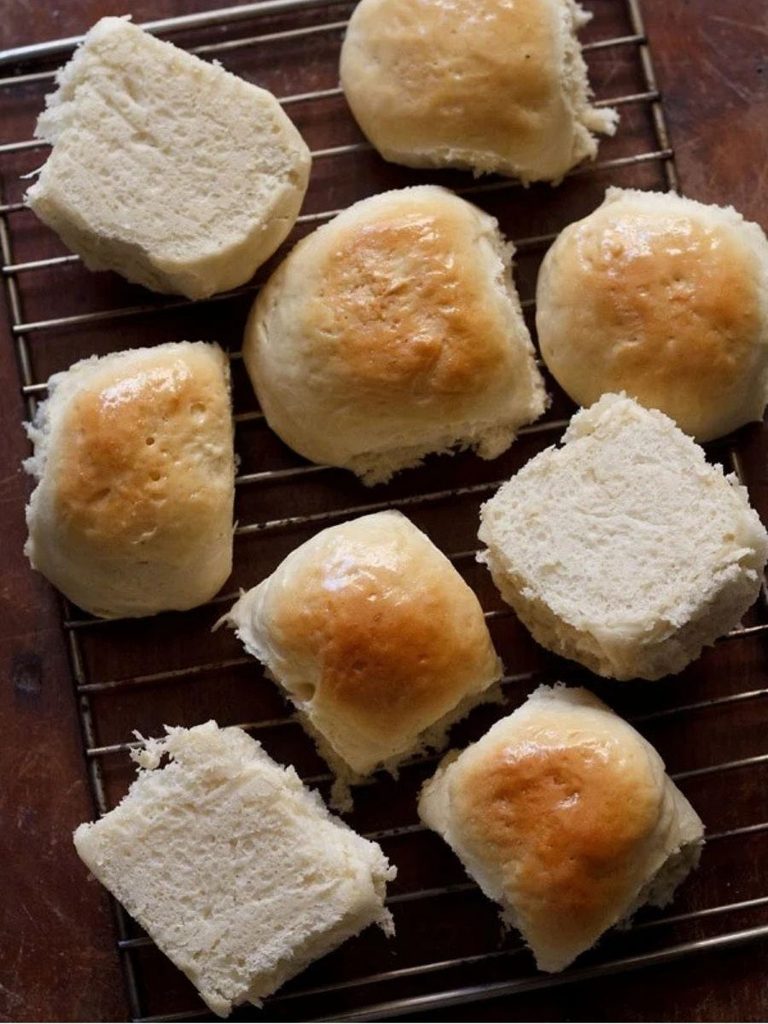
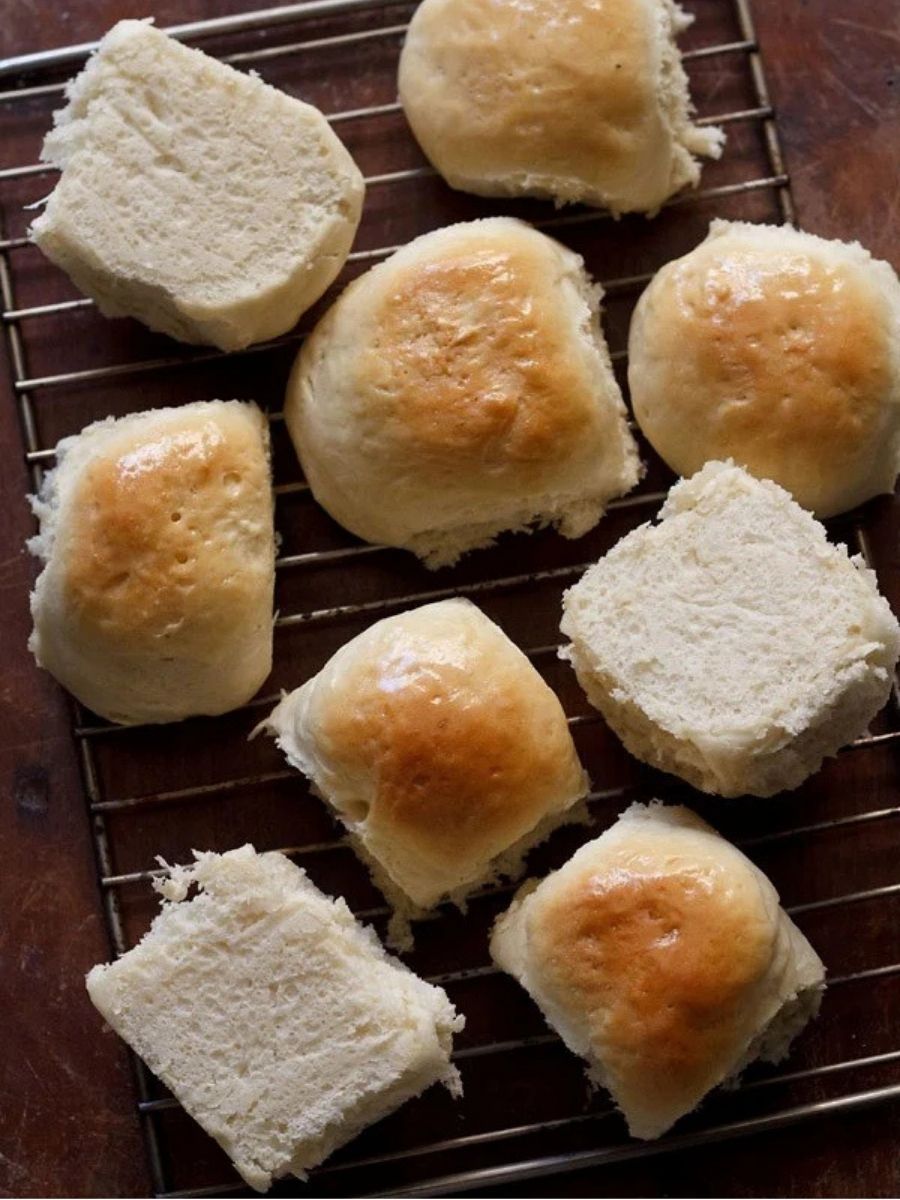
Pav, also known as Ladi Pav or Pav Bread, is a beloved soft bread roll associated with Mumbai’s vibrant street-food culture.
These homemade buns have a wonderfully light, fluffy texture with a tender crumb that makes them ideal for soaking up flavorful curries and vegetable dishes.
The dough begins with all-purpose flour, instant yeast, sugar, salt, and lukewarm water, creating a simple but reliable base for soft dinner rolls.
Oil or softened butter adds richness and helps produce a supple, elastic dough that becomes easy to shape after kneading.
After the dough rises, it is divided into equal portions and rolled into smooth rounds.
Arranging the rolls close together in a greased tray allows them to bake into the characteristic connected rows of pav.
A milk brushing before baking helps the tops develop an appealing golden finish, while melted butter brushed over the warm buns adds extra richness and a delicate buttery surface.
Freshly baked pav is delicious while still warm, but it can also be enjoyed at room temperature.
Serve these soft rolls alongside curry, vegetables, or as simple bun maska with masala chai.
Their versatile flavor and airy texture make them a practical homemade bread for both everyday meals and Indian street-food-inspired spreads.
Traditional Pav Bread
Ingredients
Equipment
Method
- Make the Initial Batter: Combine 1 cup of all-purpose flour, the yeast, and sugar in a bowl, then pour in 1 cup of lukewarm water and whisk or stir until you have a smooth, thick batter without lumps.
- Rest the Batter: Cover the bowl and let the mixture stand for 30 to 40 minutes, until it becomes bubbly and frothy on the surface and has visibly risen.
- Begin the Dough: Add the oil, salt, and 1 cup of all-purpose flour to the risen batter, then mix thoroughly with a spoon or spatula.
- Add More Flour: Mix in another 1.25 cups of all-purpose flour, combining it well before beginning to knead.
- Knead the Dough: Knead the mixture for about 10 to 12 minutes until the dough becomes smooth, soft, supple, and elastic.
- Adjust the Consistency: If the dough remains sticky, add up to about ¼ cup more flour as needed, keeping in mind that the amount of water required can vary according to the quality of the flour; the source used 3.25 cups of flour with 1 cup of lukewarm water.
- Coat the Dough: Transfer the kneaded dough to a bowl and spread oil or softened butter evenly over its surface.
- First Rise: Cover the bowl with a lid or kitchen cotton napkin and leave the dough to leaven until it rises and doubles in size; the source gives about 20 to 25 minutes for instant or fresh yeast, while dry active yeast may require about 45 minutes to 1 hour or longer.
- Shape the Dough: Gently punch down and deflate the risen dough, then shape it into a neat log.
- Divide and Roll: Cut the log into equal-sized portions and roll each portion between your palms until you have a smooth, round roll.
- Arrange the Pav: Place the shaped rolls in a greased baking tray, leaving about 1 inch of space between them.
- Second Rise: Cover the tray and allow the rolls to rise again for 25 to 30 minutes, until the small buns have visibly increased in size.
- Preheat the Oven: About 15 minutes before baking, preheat a regular oven to 200°C/390°F using both the top and bottom heating elements; for a convection microwave oven, preheat at 180°C/356°F for 15 minutes.
- Brush with Milk: Lightly brush the risen pav buns with 1 to 2 tablespoons of milk, if using, to help give the tops a golden color.
- Bake the Pav: Place the tray on the center rack of the preheated oven and bake at 200°C/390°F for 25 to 30 minutes, or until the tops are golden and the pav sounds hollow when tapped; in a convection microwave oven, bake at 180°C/356°F.
- Transfer to a Rack: Remove the baked pav from the tray with a spatula and place the rolls on a wire rack or wire tray so heat condensation does not make their bottoms soft and moist.
- Brush with Butter: Brush the warm pav with 1 to 2 tablespoons of melted butter or spread softened butter over the tops, if desired.
- Serve: Serve the pav warm or at room temperature with curry, a vegetable dish, or simply as buttered bun maska alongside masala chai.
- Store the Pav: Once cooled, keep the pav in an airtight container or bread box and store it in the refrigerator for about a week.
Notes
- The source recipe uses 3.25 cups of flour, although the total range is 3.25 to 3.5 cups.
- Use lukewarm water when preparing the initial yeast batter.
- If the dough feels sticky, add flour gradually, up to about ¼ cup as needed.
- If the dough looks dry, the source recommends adding some water.
- Leavening time varies depending on the type of yeast used.
- Unbleached all-purpose flour can be used, and bread flour is also suitable according to the source.
- If the pav browns too quickly during baking, cover the top with aluminum foil or parchment paper to prevent further browning.
- The dough can be kneaded by hand, in a food processor, or with a stand mixer fitted with a dough hook.
- The recipe can be halved, doubled, or tripled.
- Allowing the baked pav to cool on a wire rack helps prevent the bottoms from becoming soft from condensation.
Chef’s Secret
The most important detail for achieving soft, fluffy pav is paying attention to the dough’s consistency rather than automatically adding all the flour at once.
The source uses 3.25 cups of flour with 1 cup of lukewarm water, but flour quality can affect how much is needed.
After adding the flour gradually, knead the dough thoroughly for 10 to 12 minutes until it becomes smooth, supple, and elastic.
If it remains sticky, add the extra flour little by little rather than adding a large amount immediately. The finished dough should be soft and elastic.
During the final rise, look for the rolls to visibly increase in size before baking, which helps maintain the characteristic light texture of ladi pav.
Serving Suggestions
Serve the freshly baked pav warm or at room temperature alongside flavorful Indian curries or vegetable dishes.
The soft crumb is especially useful for soaking up sauces and gravies.
For a simple snack, split the pav and spread it with butter to make bun maska, then enjoy it with masala chai.
The rolls can also be placed on a serving platter with a selection of curry or vegetable dishes for a casual Indian-inspired meal.
For the richest finish, brush the warm tops with melted butter immediately after baking.
Conclusion
These homemade ladi pav bring the soft, airy texture and golden finish of classic Mumbai-style bread to the home kitchen.
Their simple ingredients and versatile character make them suitable for curries, snacks, and buttered tea-time servings.
With careful kneading, proper rising, and a wire-rack cooling step, the pav develops a tender interior and appealing baked crust.
Whether served warm with a savory dish or enjoyed as bun maska, these fluffy rolls are a delicious and practical homemade bread.
