
CookLibrary is a recipe curation and editorial platform. We research and curate recipes from public sources, considering ratings, reviews, comments, and feedback. We then refine and present them clearly for home cooks. We are committed to an ad-free, focused experience that makes discovering and preparing recipes easier.

These German-style hard rolls are made for anyone who loves bread with a crisp, deeply baked exterior and a soft, pleasantly chewy center.
The dough starts with bread flour, dry yeast, water, sugar, salt, shortening, and two whipped egg whites, creating a dough that becomes smooth, stretchy, and airy as it is kneaded.
Optional diastatic malt adds another layer to the baking process while supporting the distinctive character of the rolls.
What makes these rolls especially appealing is the combination of careful shaping, a second proof, high oven heat, and plenty of steam.
The steam helps create the signature firm crust, while the hot oven encourages the shaped dough to expand beautifully.
A light egg-white wash gives the finished rolls a polished surface and subtle savory note.
Each portion is shaped into a slightly elongated roll before being scored across the top, allowing the dough to open naturally during baking.
The result is a batch of golden rolls with a substantial crust and a satisfying interior, making them suitable for breakfast, sandwiches, or serving alongside a meal.
The dough can also be refrigerated overnight, giving you flexibility when planning your baking.
For a quicker option, the dough can rise at room temperature until doubled before shaping.
With 12 rolls from one batch and only 15 to 18 minutes of baking time, these hard rolls are a practical choice when you want fresh, bakery-style bread at home.
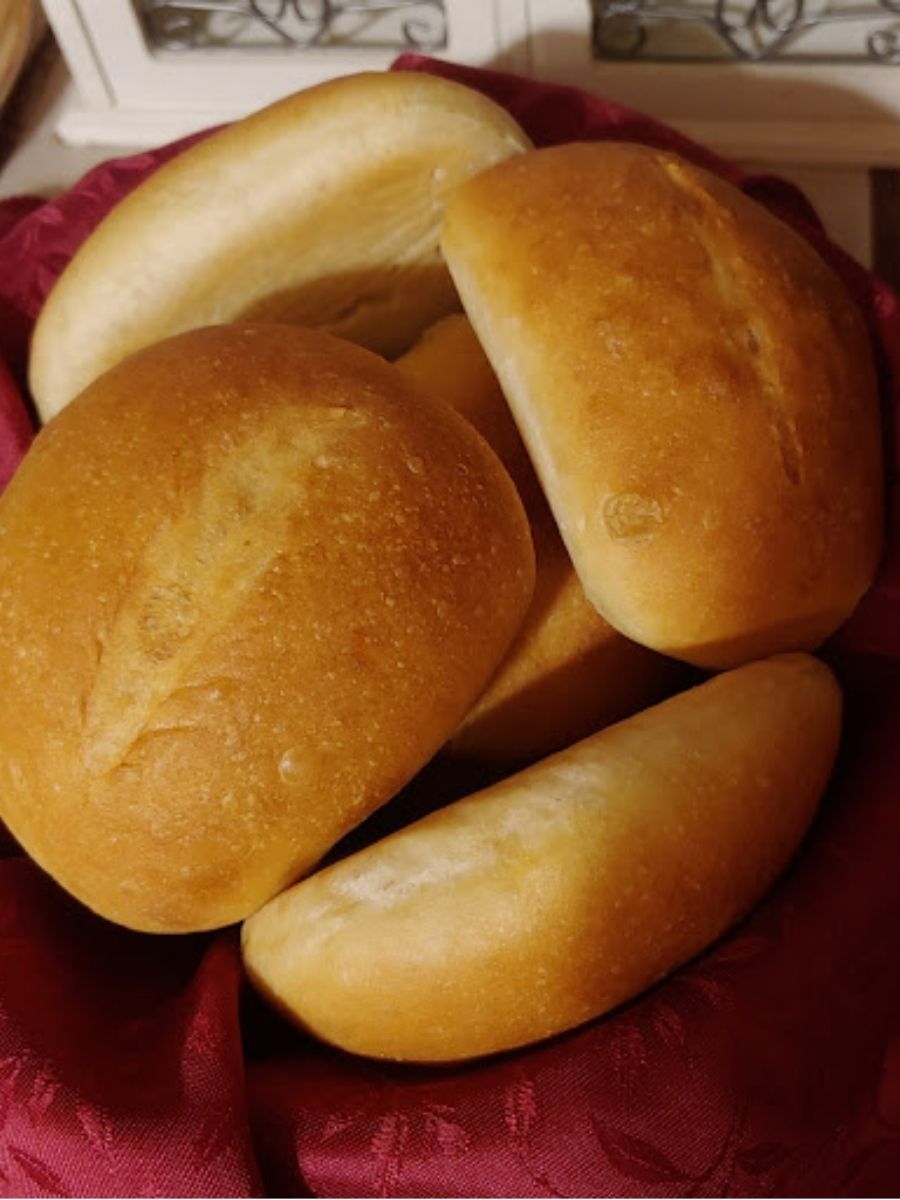

Classic German Hard Rolls
Ingredients
Equipment
Method
- Whip the Egg Whites: Beat the 2 large egg whites until they form stiff peaks, then set them aside to fold into the dough later.
- Arrange the Salt: When preparing the dry ingredients, keep the salt separated from the yeast in the mixing bowl so the yeast can first become incorporated into the flour before directly contacting the salt.
- Combine the Dry Ingredients: Place the bread flour, dry yeast, salt, optional diastatic malt, and shortening into a mixing bowl.
- Add the Water: Gradually mix in the 300 milliliters of water until the ingredients are fully incorporated.
- Fold in the Egg Whites: Gently fold the stiffly beaten egg whites into the dough until they are incorporated.
- Adjust the Dough: If the dough feels too wet, add a small amount of flour; if it is too dry, add a small amount of water, making adjustments in small increments.
- Knead the Dough: Knead until the dough becomes smooth, glossy, stretchy, and soft with some pullback; in a stand mixer, this takes about 8 to 10 minutes, while hand kneading takes significantly longer.
- Check the Gluten: If using a stand mixer, begin checking the dough after about 5 minutes and continue testing it every few minutes; stop when it feels smooth and silky with good stretch, since over-kneading can make the finished rolls tough and difficult to chew.
- Prepare for Hand Kneading: If kneading by hand, lightly butter your hands and work surface rather than heavily flouring them, which helps prevent excess flour from being incorporated and making the dough dense.
- Weigh the Dough: Before placing the dough into the oiled bowl, weigh it and divide the total weight by 12 if making 12 rolls, giving you an approximate portion size of 85 grams, or 3 ounces, per roll.
- Refrigerate for Flavor: Place the dough in an oiled bowl, cover it with plastic wrap that has been coated with non-stick spray or oil, and refrigerate it overnight to allow the dough to develop flavor.
- Use the Quick Proofing Option: If you do not have time for overnight refrigeration, let the dough sit at room temperature for about 40 minutes, or until it doubles in size, while watching carefully to prevent overproofing.
- Transfer the Dough: Gently remove the dough from the bowl and place it on an oiled work surface without punching it down.
- Divide the Dough: Cut the dough into quarters, then divide the manageable pieces into approximately 85-gram, or 3-ounce, portions, using a scale to keep the rolls evenly sized.
- Shape the Rolls: Hold each dough portion with both hands, fingers pointing away from you, then curl your fingers into the dough and repeatedly fold it into itself until the exterior develops a smooth skin and the dough feels firmer from the gluten being stretched.
- Form the Final Shape: Shape each piece into a loose football shape, remembering that the surface may still show air bubbles rather than becoming completely smooth.
- Arrange for the Second Proof: Place the shaped rolls on parchment paper or a non-stick pan, cover them, and leave them at room temperature for about 30 minutes for the second proof.
- Create the Steam: Place a pan containing about 6 cups of water in the bottom of the oven, then preheat the oven to 475°F for at least 15 minutes so the water begins boiling and produces steam; monitor the water level.
- Score the Rolls: While the oven preheats, use a very sharp knife or razor to make a gentle slit across the top of each roll, breaking the surface tension so the dough can expand during baking.
- Prepare the Egg Wash: Whisk the remaining egg white with about 1 tablespoon of water or milk and a pinch of salt until combined.
- Brush the Rolls: Use a pastry brush to coat the entire surface of each roll evenly with the egg wash.
- Lower the Oven Temperature: Reduce the oven temperature to 425°F, then place the tray of rolls inside carefully so that as little steam as possible escapes.
- Bake the Rolls: Bake for 15 to 18 minutes, adjusting according to your oven and pan; the source notes that dark-colored pans cook faster than light-colored pans.
- Use the Alternative Steam Method: Instead of a water pan, an oven-safe cast-iron skillet or pan can be placed on the bottom of the oven, then a handful of large ice cubes can be added after the rolls are placed inside to generate steam.
- Rebuild Steam Between Batches: If baking multiple batches, return the oven to 475°F between batches and rebuild the steam before placing in the next tray, then reduce the temperature to 425°F again for baking.
- Serve the Finished Rolls: Remove the rolls after 15 to 18 minutes of baking and allow them to cool sufficiently before serving, preserving their crisp hard-roll crust and soft interior.
Notes
- Weigh the flour and dough portions for more consistent results, especially when dividing the dough into 12 rolls.
- Keep the salt separated from the yeast when initially adding the dry ingredients.
- Make dough adjustments gradually; add only a little flour if the dough is too wet or a little water if it is too dry.
- Avoid over-kneading, as the source notes that this can make the finished rolls tough.
- Refrigerating the dough overnight is the preferred option for developing flavor.
- If using the quicker room-temperature rise, watch the dough closely and stop the proof once it has doubled to avoid overproofing.
- Steam is essential for developing the characteristic hard, crunchy crust.
- Between batches, restore the oven to 475°F and rebuild the steam before lowering the temperature to 425°F again.
- Pan color affects baking speed, with dark pans cooking faster than light-colored ones.
Chef’s Secret
The most important detail for achieving the characteristic hard-roll crust is maintaining plenty of steam during the beginning of baking.
The source uses about 6 cups of water in a pan at the bottom of the oven while it preheats to 475°F, allowing the water to boil and fill the oven with steam.
When the rolls go in, reduce the temperature to 425°F while taking care not to let too much steam escape.
If you are baking another batch, rebuild the steam by bringing the oven back to 475°F before lowering it again.
This combination of high initial heat and steam is what helps distinguish these rolls from ordinary soft bread rolls.
Serving Suggestions
Serve these crusty rolls warm or at room temperature alongside breakfast dishes, soups, stews, or hearty main courses.
They can be split and filled with your favorite sandwich ingredients, or simply served with butter.
The firm crust also makes them useful for soaking up sauces and savory cooking juices.
For a simple serving, place the freshly baked rolls in a bread basket and offer butter alongside them.
Conclusion
These hard rolls combine a crisp, substantial crust with a soft, chewy interior for a satisfying homemade bread experience.
Careful dough handling, proper proofing, sharp scoring, and generous oven steam are the key parts of the method.
The overnight refrigeration option also gives you a convenient way to prepare the dough ahead of baking.
